

Sink marks are a common defect in injection molding, appearing as small depressions on the surface of molded parts, particularly in thicker sections.
These imperfections occur due to uneven cooling rates during the molding process, which can lead to aesthetic and quality issues, especially in products where appearance is crucial.

In this article, we’ll explore what sink marks are, their causes, and effective strategies for prevention and resolution.
Read on to discover valuable insights that can help you achieve flawless results in your injection molding projects!
What Are Sink Marks?

Sink marks are surface defects that appear as shallow depressions or dimples on injection molded parts, typically found in thicker areas of the component.
While these marks do not generally affect the structural integrity or function of the part, they can significantly impact its aesthetic appeal.
The visibility of sink marks often depends on factors like depth, color, and texture; glossy surfaces and darker colors tend to highlight these imperfections more prominently.
In applications where appearance is critical, such as consumer electronics, even minor sink marks can lead to quality concerns.
How Sink Marks Are Formed
Sink marks form during the cooling process in injection molding.
As molten plastic is injected, the outer layers cool quickly while thicker sections retain heat longer, leading to uneven cooling.
This causes thermal contraction, where the inner material pulls inward, creating depressions on the surface known as sink marks.
Causes of Sink Marks

Material Issues
#1 Low Melting Temperature
If the melt temperature is set too low, the plastic may not flow smoothly into the mold, leading to uneven cooling.
This can increase the likelihood of sink marks as the thicker areas cool more slowly and contract, pulling the outer surface inward.
#2 Incorrect Material Selection
Choosing a material that doesn’t align with the part’s design requirements can exacerbate sink formation.
For instance, materials with high viscosity may not fill the mold properly, leading to inadequate packing and increased shrinkage in thicker sections.
Machine Parameters

#1 Insufficient Pack and Hold Pressure
When the pack and hold pressure is too low, there may not be enough material to fill the mold completely, especially in thicker sections.
This can result in air pockets forming as the part cools, creating sink marks on the surface.
#2 High Mold Temperature
A mold that is set too hot can prevent the gate from sealing effectively.
If the gate does not freeze at the right time, molten plastic can escape, leading to incomplete filling and the formation of sink marks due to uneven cooling.
#3 Low Pack and Hold Time
If the time allotted for packing and holding is insufficient, the molten material may not have enough time to properly fill all areas of the mold before solidifying.
This can lead to shrinkage-related defects, including sink marks, as the material contracts.
Part Geometry
#1 Influence of Wall Thickness
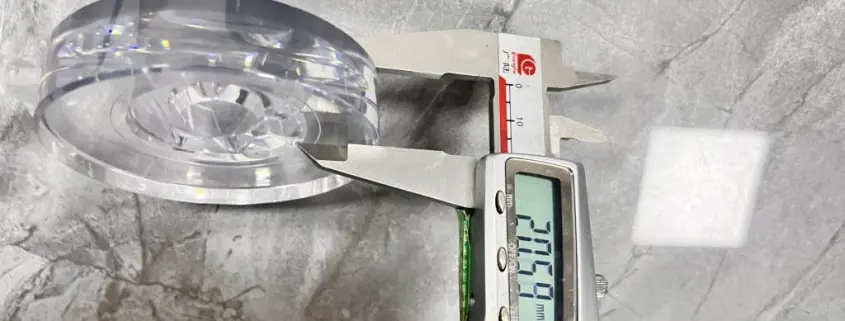
Variations in wall thickness can significantly impact the cooling process.
Thicker areas cool more slowly, resulting in greater thermal contraction and a higher chance of sink marks appearing as the outer surface pulls inward.
#2 Ribs and Bosses Design
Poorly designed ribs and bosses can create stress concentrations in the part.
If these features are too thick or improperly placed, they can lead to uneven cooling and an increased risk of sink marks where they intersect with the nominal wall.
#3 Importance of Uniform Wall Thickness
Maintaining a uniform wall thickness throughout the part helps ensure even cooling rates.
This consistency reduces the likelihood of sink marks, as molten plastic can flow more uniformly and contract evenly as it cools.
Preventing Sink Marks
Adjusting Machine Settings
#1 Recommendations for Melt Temperature and Cooling
Maintaining the melt temperature within the manufacturer’s recommended range is crucial.
Too high a temperature can prolong cooling times and increase the risk of sink marks.
Additionally, optimizing the cooling rate helps ensure even temperature distribution, reducing the likelihood of thermal contraction in thicker areas.
#2 Guidelines for Pack and Hold Pressure and Time
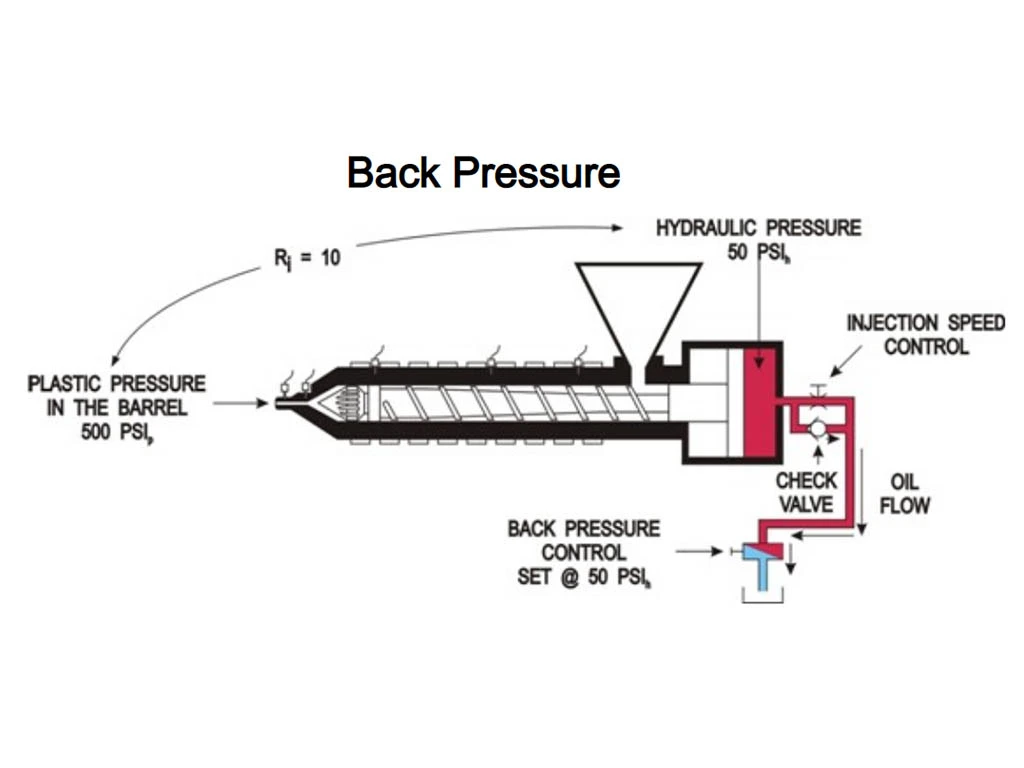
To effectively counteract shrinkage, it’s essential to set appropriate pack and hold pressures.
A general guideline is to maintain pack pressure between 50-70% of the injection pressure.
Furthermore, extending the hold time allows the gate to seal properly, ensuring enough material remains in the mold to compensate for any shrinkage.
Design for Manufacturability (DFM)

#1 Best Practices in Part Design to Minimize Defects
Implementing DFM principles during the design phase can significantly reduce the occurrence of sink marks.
This includes creating uniform wall thickness and balancing rib and wall designs.
Rounding edges and avoiding abrupt transitions can also help maintain consistent flow and cooling.
#2 Importance of Simulation in the Design Phase
Using simulation software to model the injection molding process can identify potential sink marks before production.
These simulations allow engineers to visualize material flow, cooling rates, and stress concentrations, facilitating design adjustments that minimize defects.
Mold Design Improvements

#1 Gate Placement and Design Considerations
The location and size of the gate play a critical role in filling the mold.
Positioning gates closer to thicker areas ensures better flow and reduces the risk of premature freeze-off, which can lead to sink marks.
Additionally, using larger gates can enhance material flow and minimize pressure drops.
#2 Enhancing Cooling Channel Design
Effective cooling channel design is vital for maintaining consistent temperatures throughout the mold.
Using conformal cooling techniques or strategically placed channels can help evenly distribute cooling, reducing temperature differentials that lead to sink marks.
Ensuring high thermal conductivity materials are used for cooling channels can also enhance cooling efficiency.
Troubleshooting Sink Marks

Identifying Sink Marks During Production
Spotting sink marks early in the production process is crucial for maintaining product quality.
Regular inspections of molded parts can help identify sink marks, which appear as small depressions on thicker areas of the component.
Visual inspection under proper lighting can reveal these defects, while tools, like coordinate measuring machines (CMM), can provide precise measurements for more accurate assessments.
Steps for Corrective Action in Ongoing Processes

When sink marks are detected, taking immediate corrective actions can mitigate further issues.
Here are some steps to follow:
- Adjust Machine Settings: Review and modify the melt temperature, pack pressure, and hold time-based on the specific part requirements.
- Evaluate Material: Ensure the right material is being used and check for any variations that may affect the molding process.
- Inspect Mold Design: Examine the mold for any design flaws, especially around the gate and cooling channels, and make necessary adjustments to improve cooling and flow.
Tips for Achieving Optimal Results

To consistently produce high-quality parts with minimal sink marks, consider the following tips:
- Implement DFM Principles: Utilize design guidelines that promote uniform wall thickness and proper rib and boss design.
- Utilize Simulation Tools: Leverage simulation software during the design phase to anticipate potential sink marks and adjust designs accordingly.
- Monitor Process Parameters: Keep a close watch on all injection molding parameters during production, ensuring they align with the best practices established in the design phase. Regular maintenance of machinery also helps maintain optimal conditions.
FAQs
How to Get Rid of Sink Marks in Injection Molding?
To eliminate sink marks, ensure the melt temperature is within the manufacturer’s recommended range and adjust pack and hold pressures appropriately. Increasing pack and hold time can help maintain adequate pressure until the gate seals, preventing material from exiting the cavity. Additionally, optimizing part design, such as balancing wall thickness and using effective cooling channel designs, can mitigate sink marks.
What Are Sink Marks?
Sink marks are surface depressions that occur in injection-molded parts, typically found in thicker areas where the cooling rate is uneven. These cosmetic defects result from thermal contraction during cooling, causing the outer part of the molded piece to pull inwards, creating visible dimples or grooves.
What Is the Difference Between Sink Mark and Shrinkage?
Sink marks refer to localized depressions on a molded part’s surface, usually due to uneven cooling in thicker sections. Shrinkage, on the other hand, is a general term that describes the reduction in volume that occurs as the plastic cools and solidifies. While both involve cooling, sink marks specifically refer to aesthetic defects rather than a uniform decrease in part size.
Conclusion

In summary, sink marks are common defects in injection molding, primarily caused by uneven cooling and improper design.
Understanding their formation, causes, and prevention methods is crucial for achieving high-quality molded parts.
By addressing these factors, manufacturers can minimize defects and improve overall product quality.
If you’re looking to enhance your injection molding processes and eliminate sink marks, consider implementing the strategies outlined in this article.
For expert guidance tailored to your specific needs, don’t hesitate to reach out to us today!


 English
 Arabic
 German
 Spanish
 French
 Italian
 Javanese
 Korean
 Portuguese
 Russian
 Hindi
 Chinese
