


Introduction: How to Make A Hard Plastic Mold
Learn the step-by-step process of making a hard plastic mold, from designing with precision to selecting the right materials and ensuring flawless production. This guide covers everything you need to know to produce high-quality plastic parts efficiently and consistently.
Step 1: Design the Mold
The first step in making a hard plastic mold is designing it carefully. A detailed design is crucial because every little detail affects the final product. This is where CAD (Computer-Aided Design) software comes in handy.
It helps you create precise designs that ensure the mold will work as expected.
When designing, it’s important to think about things like parting lines, draft angles, and shrinkage. Parting lines are where the mold separates, and you want to make sure they’re placed in a way that doesn’t affect the look or function of the part.
Draft angles help with removing the part from the mold without damaging it. Shrinkage happens as the plastic cools, so you need to account for it in the design to make sure the final product is the right size.
Getting the design right from the start makes the rest of the process smoother and helps avoid costly mistakes later on.
Step 2: Choose the Right Materials
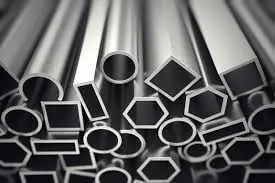
Choosing the right material for your mold is a big deal. Common options include steel and aluminum, each with its own pros and cons. Steel is strong and durable, making it great for molds that need to last a long time, especially in high-volume production.
On the other hand, aluminum is lighter and less expensive, which works well for smaller production runs or when you need to keep costs down.
When picking a material, think about how strong the mold needs to be, how much it will cost, and how many parts you plan to produce. If you’re making thousands of parts, steel might be the better choice because it holds up under repeated use.
But if you’re only making a small batch, aluminum could save you money while still getting the job done. The key is to match the material to your specific needs so that you get the best performance without overspending.
Step 3: CNC Machining the Mold

CNC machining is where your mold starts to take shape. This step is all about using precision tools to carve out the mold from the chosen material, whether it’s steel or aluminum.
CNC machines follow the design you created earlier, cutting with incredible accuracy to ensure every detail is just right.
Precision is everything here. Even the smallest mistake can lead to problems later on, like parts that don’t fit together or look the way they should.
That’s why it’s so important to keep a close eye on the machining process. Regularly checking the work as it progresses helps catch any issues early so they can be fixed before they become bigger problems.
In short, CNC machining turns your design into reality, and making sure it’s done right is key to producing a mold that works perfectly.
Step 4: Polishing and Finishing
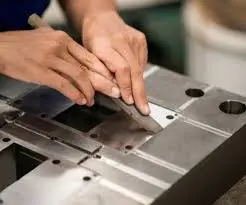
Polishing the mold might seem like a small step, but it makes a huge difference. A well-polished mold ensures that the plastic parts come out smooth and free of defects.
This step removes any rough spots or tiny imperfections left from the machining process, giving the mold a clean, smooth surface.
The quality of the final plastic part depends a lot on how well the mold is finished. If the mold is polished correctly, the plastic parts will look better and perform better, too.
They’ll be easier to release from the mold, reducing the chances of damage during production. So, taking the time to polish and finish the mold properly really pays off in the end.
Step 5: Testing the Mold

Before jumping into full production, it’s crucial to test the mold to make sure everything works as planned. This step, often called mold testing or tool sampling, involves running a few cycles with the mold to produce sample parts.
These samples give you a clear idea of how the mold performs.
During testing, you’re looking for any defects or issues in the parts, like warping, incomplete fills, or surface imperfections. If you spot any problems, this is the time to fix them.
Making adjustments now ensures that when you start full production, the mold will produce high-quality parts consistently. Testing might take some extra time, but it saves you from bigger headaches down the road.
Step 6: Production

Once the mold passes testing, it’s time to move into full-scale production. Setting up the mold for this stage involves securing it in the injection molding machine and making sure everything is aligned correctly.
This setup is crucial because any misalignment can lead to defects in the parts.
The injection molding process itself is straightforward: molten plastic is injected into the mold under high pressure. The plastic fills the mold cavity, cools, and hardens into the desired shape.
After cooling, the machine ejects the finished part, and the process repeats.
Repetition is key in mass production. The injection molding machine runs cycle after cycle, producing hundreds or thousands of identical parts.
The goal here is consistency—each part should be exactly like the one before it, with no variation in quality. With the right setup and careful monitoring, the process runs smoothly, delivering large quantities of high-quality plastic parts.
FAQs Related to Hard Plastic Mold
Can You Make Your Own Plastic Molds?
Yes, you can make your own plastic molds for small-scale projects or prototyping. The process typically involves selecting a suitable molding material (such as silicone for flexible molds or thermosetting plastics for rigid molds), designing the mold based on the desired shape of the plastic part, and then using techniques like casting or machining to create the mold.
For DIY enthusiasts or those looking to prototype designs, creating your own molds can be a cost-effective solution. However, for mass production or highly detailed parts, professional mold-making might be required.
How Do You Mold Strong Plastic?
Molding strong plastic involves several key steps:
- Material Selection: Choose a strong plastic material suited to your needs, such as ABS, polycarbonate, or nylon.
- Mold Design: Design a mold that can withstand the high pressure and temperatures of the injection molding process.
- Injection Molding Process: Use injection molding, where the selected strong plastic is melted and injected into the mold cavity under high pressure. This process is ideal for creating durable, high-strength plastic parts.
- Cooling and Ejection: Allow the plastic to cool and solidify in the mold before ejecting the finished part.
What is the Hard Plastic for Molding?
Polycarbonate is often considered one of the hardest plastics suitable for molding. It offers exceptional strength, impact resistance, and clarity, making it ideal for a wide range of applications, including bulletproof glass, eyewear lenses, and electronic components.
Other hard plastics used in molding include ABS (Acrylonitrile Butadiene Styrene) and POM (Polyoxymethylene), which are known for their durability and precision in finished parts.
How Do You Mould Plastic Parts?
Molding plastic parts typically involves:
- Designing the Part and Mold: Start with a precise design of the part you wish to create, followed by designing the mold based on this part.
- Choosing a Molding Process: Select a molding process, such as injection molding, blow molding, or rotational molding, depending on the part design and material.
- Preparing the Plastic Material: Choose the appropriate plastic material for your application and prepare it for the molding process.
- Molding the Part: Heat the plastic until it’s malleable, and then force it into the mold cavity. Allow it to cool and solidify before removing the finished part from the mold.
- Finishing Touches: Perform any necessary post-processing steps, such as trimming excess material or polishing the part.
Can You Use Hard Plastic as a Resin Mold?
Yes, hard plastics can be used as molds for resin casting, particularly when creating small, detailed parts or when a rigid mold is required. Materials like ABS or high-density polyethylene (HDPE) are commonly used for this purpose.
These complex plastic molds are durable and can produce highly detailed parts. However, it’s essential to properly prepare the mold surface (e.g., through adequate release agents) to ensure the resin does not stick to the mold and can be demolded easily.
Related Articles
- Medical Injection Molding: Precision in Healthcare
- Liquid Silicone Rubber Injection Molding: A Detailed Guide
- Mastering Injection Molding Tolerances: Key Insights
- Reaction Injection Molding: Process, Benefits and Uses
- Injection Molding Defects and Their Solutions
- Aluminum Injection Molding: Cost, Benefits, and Design
- ABS Injection Molding: Key Benefits, Process
- Ultimate Guide to HDPE Injection Molding
- 10 Common Plastic Resins for Injection Molding
- Injection Molding vs. Compression Molding


 English
 Arabic
 German
 Spanish
 French
 Italian
 Javanese
 Korean
 Portuguese
 Russian
 Hindi
 Chinese
