

3D Printing has transformed Prototyping, enabling fast, affordable, and flexible product testing.

Unlike traditional methods that require specialized tools and high costs, 3D Printing allows businesses to produce prototypes quickly, test designs thoroughly, and make adjustments easily, accelerating product development and boosting confidence across industries.
Understanding Rapid Prototyping
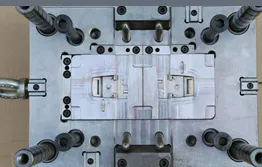
Rapid Prototyping is the process of swiftly producing an initial model to test and refine a design, acting as a “rough draft” that helps designers and engineers evaluate the functionality and improve the product before large-scale production.
It’s essential in modern development, allowing for faster, iterative design cycles.
3D Printing has revolutionized this process. Previously, Prototyping involved complex machinery, extended lead times, and high costs.
Traditional methods like injection molding and CNC machining demanded custom tools and skilled labor, limiting the rounds of design iteration companies could afford.
Now, with 3D Printing, teams can create prototypes directly from digital models, bypassing the need for specialized tooling.
This shift has streamlined product development immensely.
With 3D Printing, teams can quickly explore multiple versions, testing various materials, shapes, and functions to find the optimal design.
This flexibility reduces costs, shortens time-to-market, and minimizes roadblocks—providing companies a significant edge in today’s fast-paced market.
Why Use 3D Printing for Prototyping?

When it comes to Prototyping, 3D Printing is a game-changer that offers speed, cost-effectiveness, and unmatched design flexibility.
Let’s break down why this technology has become the go-to for rapid Prototyping across industries.
- Faster Iterations: 3D Printing slashes lead times, allowing you to print, test, and refine designs within hours. Faster iterations mean quicker feedback and a more efficient path to a market-ready product.
- Cost Savings: By removing the need for costly molds and tooling, 3D Printing makes Prototyping affordable. It’s perfect for custom designs and small-batch production, offering innovation without high expenses.
- Design Flexibility: 3D Printing allows for intricate designs and easy modifications, enabling you to adjust digital models and print updates with ease. This flexibility supports functional and aesthetic experimentation, helping you perfect your product.
Types of Prototypes with 3D Printing
3D Printing enables versatile Prototyping across various development stages, each serving a unique role in perfecting your product.
1. Concept Models

Concept models are simplified, low-detail prototypes ideal for testing initial design ideas, shapes, and structures.
They’re quick and cost-effective, perfect for brainstorming and gathering initial feedback.
2. Visual Models

Visual models focus on appearance, showcasing color, texture, and surface finish without functionality.
They’re excellent for presentations and aligning on aesthetics for marketing and design teams.
3. Functional Prototypes

Functional prototypes bring designs to life with durable materials, allowing you to test real-world performance, strength, and flexibility.
These prototypes are essential for evaluating product functionality before finalizing.
4. Pre-Production Prototypes

Pre-production prototypes match the final product in detail, serving as a realistic preview to validate the design before manufacturing.
They’re used to identify the last adjustments, ensuring market readiness.
Rapid Prototyping Process with 3D Printing
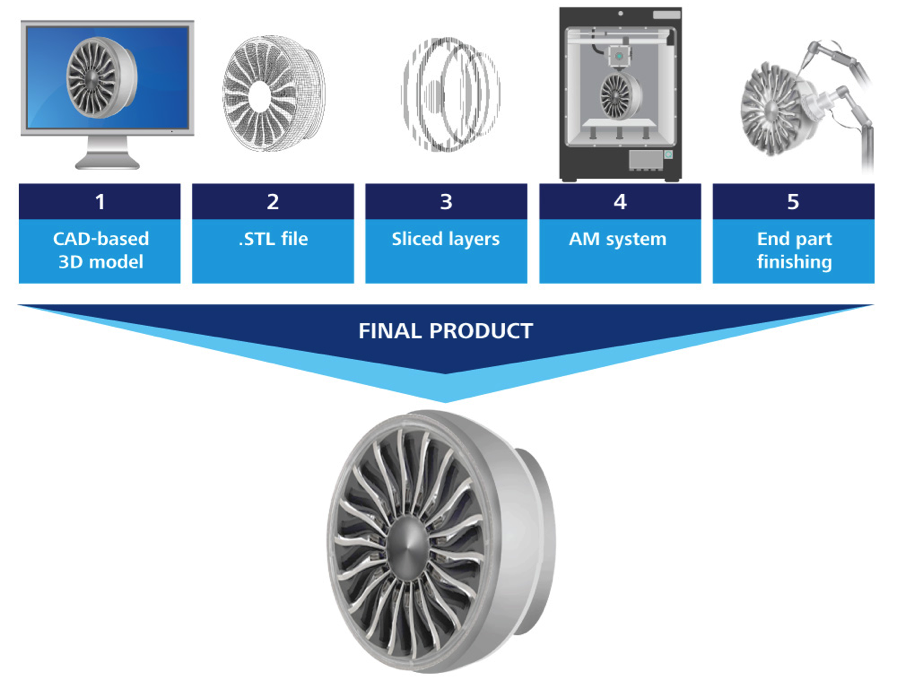
Creating a prototype with 3D Printing is a streamlined, efficient process that takes you from idea to tangible model in just a few steps.
Let’s dive into the essential stages, from the initial design to testing and iteration.
1. CAD Design: Creating the Initial Digital Model
The journey starts with CAD (Computer-Aided Design) software.
Here, you create a 3D digital model of your prototype, bringing your ideas into a digital format that’s ready for Printing.
CAD tools allow you to build precise, detailed designs that can be easily modified and shared.
This initial stage is where you work out the primary structure, dimensions, and design elements of your prototype.
2. Slicing Software: Preparing the CAD File for Printing
Once your design is finalized, it’s time to prepare it for the 3D printer using slicing software.
This software converts the CAD model into layers, generating a set of instructions (known as G-code) that guides the printer in building the prototype.
Each “slice” represents a thin cross-section of the final product, ensuring accuracy and detail during Printing.
You can also adjust settings like layer height, infill density, and support structures to match the specific needs of your design.
3. 3D Printing Process: Building the Model Layer-by-Layer

Now comes the exciting part—the actual Printing!
The 3D printer interprets the slicing software’s instructions, depositing material layer by layer until the entire model is built.
This process varies in speed and precision depending on the printer and material used.
From concept models to functional prototypes, 3D Printing brings your design into physical form with incredible detail and accuracy, often within hours.
4. Testing and Iteration: Refining Based on Feedback
Once the prototype is printed, it’s time to put it to the test.
Functional testing allows you to see how the prototype performs and whether it meets your design expectations.
Feedback gathered during testing helps identify areas for improvement, enabling you to adjust the CAD model and reprint as needed.
This iterative process is essential for refining the design, ensuring you’re left with a product that’s fully optimized and ready for the next stage of development.
Choosing the Right 3D Printer
Selecting the right 3D printer for your prototyping needs can make a big difference in both the quality of your prototype and the speed of your development process.
Let’s break down some of the main 3D printing technologies and see how each one stacks up for different prototyping goals.
1. FDM (Fused Deposition Modeling)
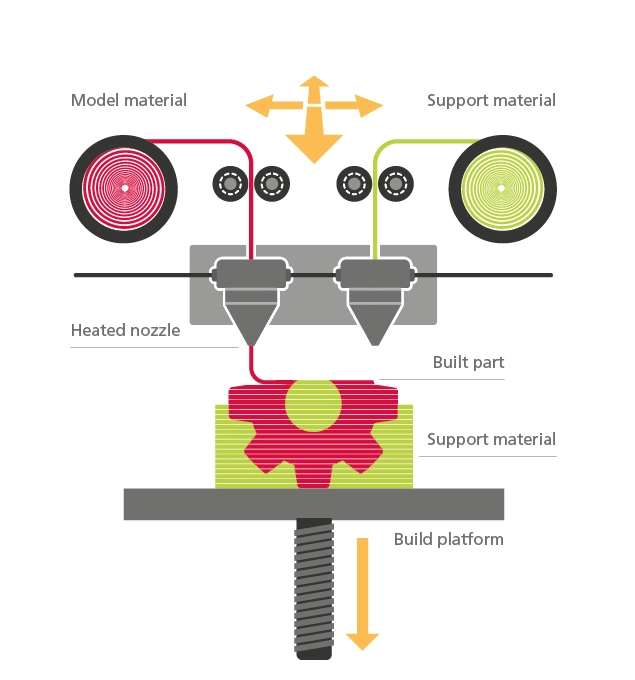
Strengths: FDM is one of the most popular and affordable 3D printing technologies, making it great for quick, cost-effective prototypes.
It works by extruding melted plastic filament layer by layer to create the model, so it’s a solid choice for simple concept models and fit testing.
Limitations: The layer lines on FDM prints are usually visible, which can make the surface finish rough. This is less ideal for high-detail or aesthetic prototypes. FDM is best suited for quick drafts or functional prototypes where visual perfection isn’t crucial.
Ideal Use Cases: Concept models, functional prototypes that need to undergo basic testing, and early iterations where speed and cost are prioritized.
2. SLA (Stereolithography)

Strengths: SLA uses a UV laser to cure liquid resin into a solid layer by layer, resulting in high-resolution prints with smooth finishes.
This precision makes SLA a great option for detailed prototypes, especially when the look and feel of the model are important.
SLA printers are often used for visual models and engineering parts that need a fine surface finish.
Limitations: SLA can be more expensive than FDM due to the cost of resin and the post-processing required, like curing and cleaning off excess resin. Also, SLA prints tend to be more brittle, which can be a downside if durability is a must.
Ideal Use Cases: Visual models, detailed prototypes for presentation, and products where surface quality and appearance matter.
3. SLS (Selective Laser Sintering)
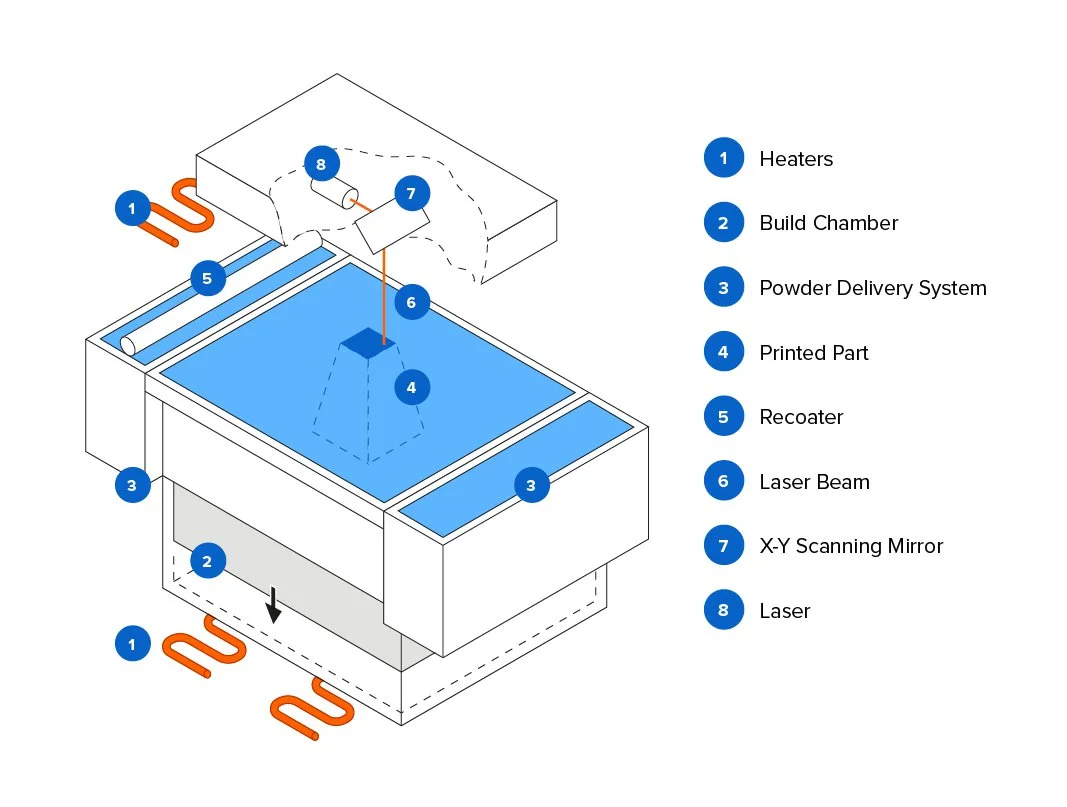
Strengths: SLS is unique in that it uses a laser to sinter powdered material, often nylon, layer by layer.
This results in durable, high-strength parts that don’t require support structures, allowing for complex geometries.
SLS is well-suited for functional prototypes that need to withstand stress and for models with intricate designs.
Limitations: SLS printers tend to be more expensive than FDM and SLA and often have longer print times. The powder also requires handling and post-processing, adding to the workflow.
Ideal Use Cases: Functional prototypes for stress testing, intricate parts with complex geometries, and prototypes that require high durability and strength.
Which 3D Printer Should You Choose?
The best 3D printer depends on your specific prototyping needs.
If you’re looking for quick, cost-effective drafts, FDM is your go-to.
For high-detail, presentation-ready models, SLA delivers precision and aesthetics.
And if durability and complex designs are what you need, SLS is the way to go.
With the right printer, you’ll be set up to create effective, optimized prototypes that move your project forward.
Top Materials for Rapid Prototyping
Choosing the right material is just as important as choosing the right 3D printer.
Each material offers unique benefits that can impact the performance, look, and feel of your prototype.
Let’s explore some of the most popular materials for rapid Prototyping and what makes them great for different needs.
- PLA (Polylactic Acid)

PLA is one of the most widely used materials in 3D Printing.
It’s derived from renewable resources like cornstarch, making it biodegradable and eco-friendly.
PLA is known for its ease of use, affordable cost, and smooth finish.
Benefits: PLA is perfect for concept models and prototypes that don’t need to handle stress or heat. It’s easy to print with and produces clean-looking parts, making it great for visual models.
Best For: Concept and visual prototypes where detail and affordability are key.
- ABS (Acrylonitrile Butadiene Styrene)

ABS is a durable plastic with good strength and heat resistance, commonly found in functional prototypes.
It’s tough and can withstand more rigorous testing than PLA, which makes it ideal for parts that need to be functional and impact-resistant.
Benefits: With ABS, you can prototype components that will face stress or rough handling. It’s also more heat-resistant than PLA, so it’s suitable for parts that may be exposed to warmer environments.
Best For: Functional prototypes and parts needing a bit more durability and heat resistance.
- Nylon (Polyamide)

Nylon is known for its flexibility, strength, and wear resistance, making it a popular choice for industrial and functional prototypes. It’s often used in SLS printing, where it creates robust, high-durability parts.
Benefits: Nylon’s flexibility makes it perfect for parts that require some movement, like hinges or clips. It’s also abrasion-resistant, which makes it a great choice for prototypes that will undergo repeated motion or stress.
Best For: Functional and mechanical prototypes, especially those that need flexibility, durability, and strength.
- Resins (for SLA Printing)

Overview: Resins are a bit different from the other materials, as they’re used in SLA (Stereolithography) and DLP (Digital Light Processing) printers. Resin printing offers high detail and smooth finishes, making it perfect for detailed prototypes and models with intricate designs.
Benefits: Resin can create prototypes with exceptional detail and smooth surfaces, which is ideal for visual models. Certain types of resins, like engineering resins, can also add strength, flexibility, or heat resistance, making them suitable for more specialized applications.
Best For: High-detail visual models, functional parts with specific needs, and presentation-ready prototypes.
Choosing the Right Material
The best material for your prototype will depend on what you’re trying to achieve.
PLA is ideal for quick, simple models, while ABS and Nylon bring durability to more functional parts.
And for intricate details, the resin is unbeatable. With the right material, you can make prototypes that look, feel, and perform just as you need them to.
Applications of Rapid Prototyping with 3D Printing
3D Printing for rapid Prototyping has become a game-changer across various industries, allowing companies to bring ideas to life faster, test designs rigorously, and get products to market more efficiently.
Let’s explore some of the most impactful applications in industries like automotive, healthcare, aerospace, and consumer products.
Automotive Industry

In the fast-paced automotive sector, rapid Prototyping with 3D Printing enables manufacturers to innovate and test parts more efficiently.
From testing new parts for performance and durability to designing custom components, automotive companies can prototype everything from dashboards to engine components.
- Example: Engineers can 3D print functional prototypes of new car parts and conduct performance tests to ensure they meet safety and quality standards. This process saves time and reduces the need for costly traditional molds and tooling.
Healthcare Sector
Healthcare has witnessed incredible advances in patient care and product development thanks to 3D Printing for Prototyping.
Rapid Prototyping allows for the creation of custom medical devices, anatomical models, and surgical tools, all tailored to individual patient needs.
- Example: Surgeons use 3D-printed models of a patient’s anatomy to plan and rehearse complex surgeries. This approach improves accuracy and patient outcomes by allowing the surgical team to see and feel the specifics of each case.
Aerospace Industry
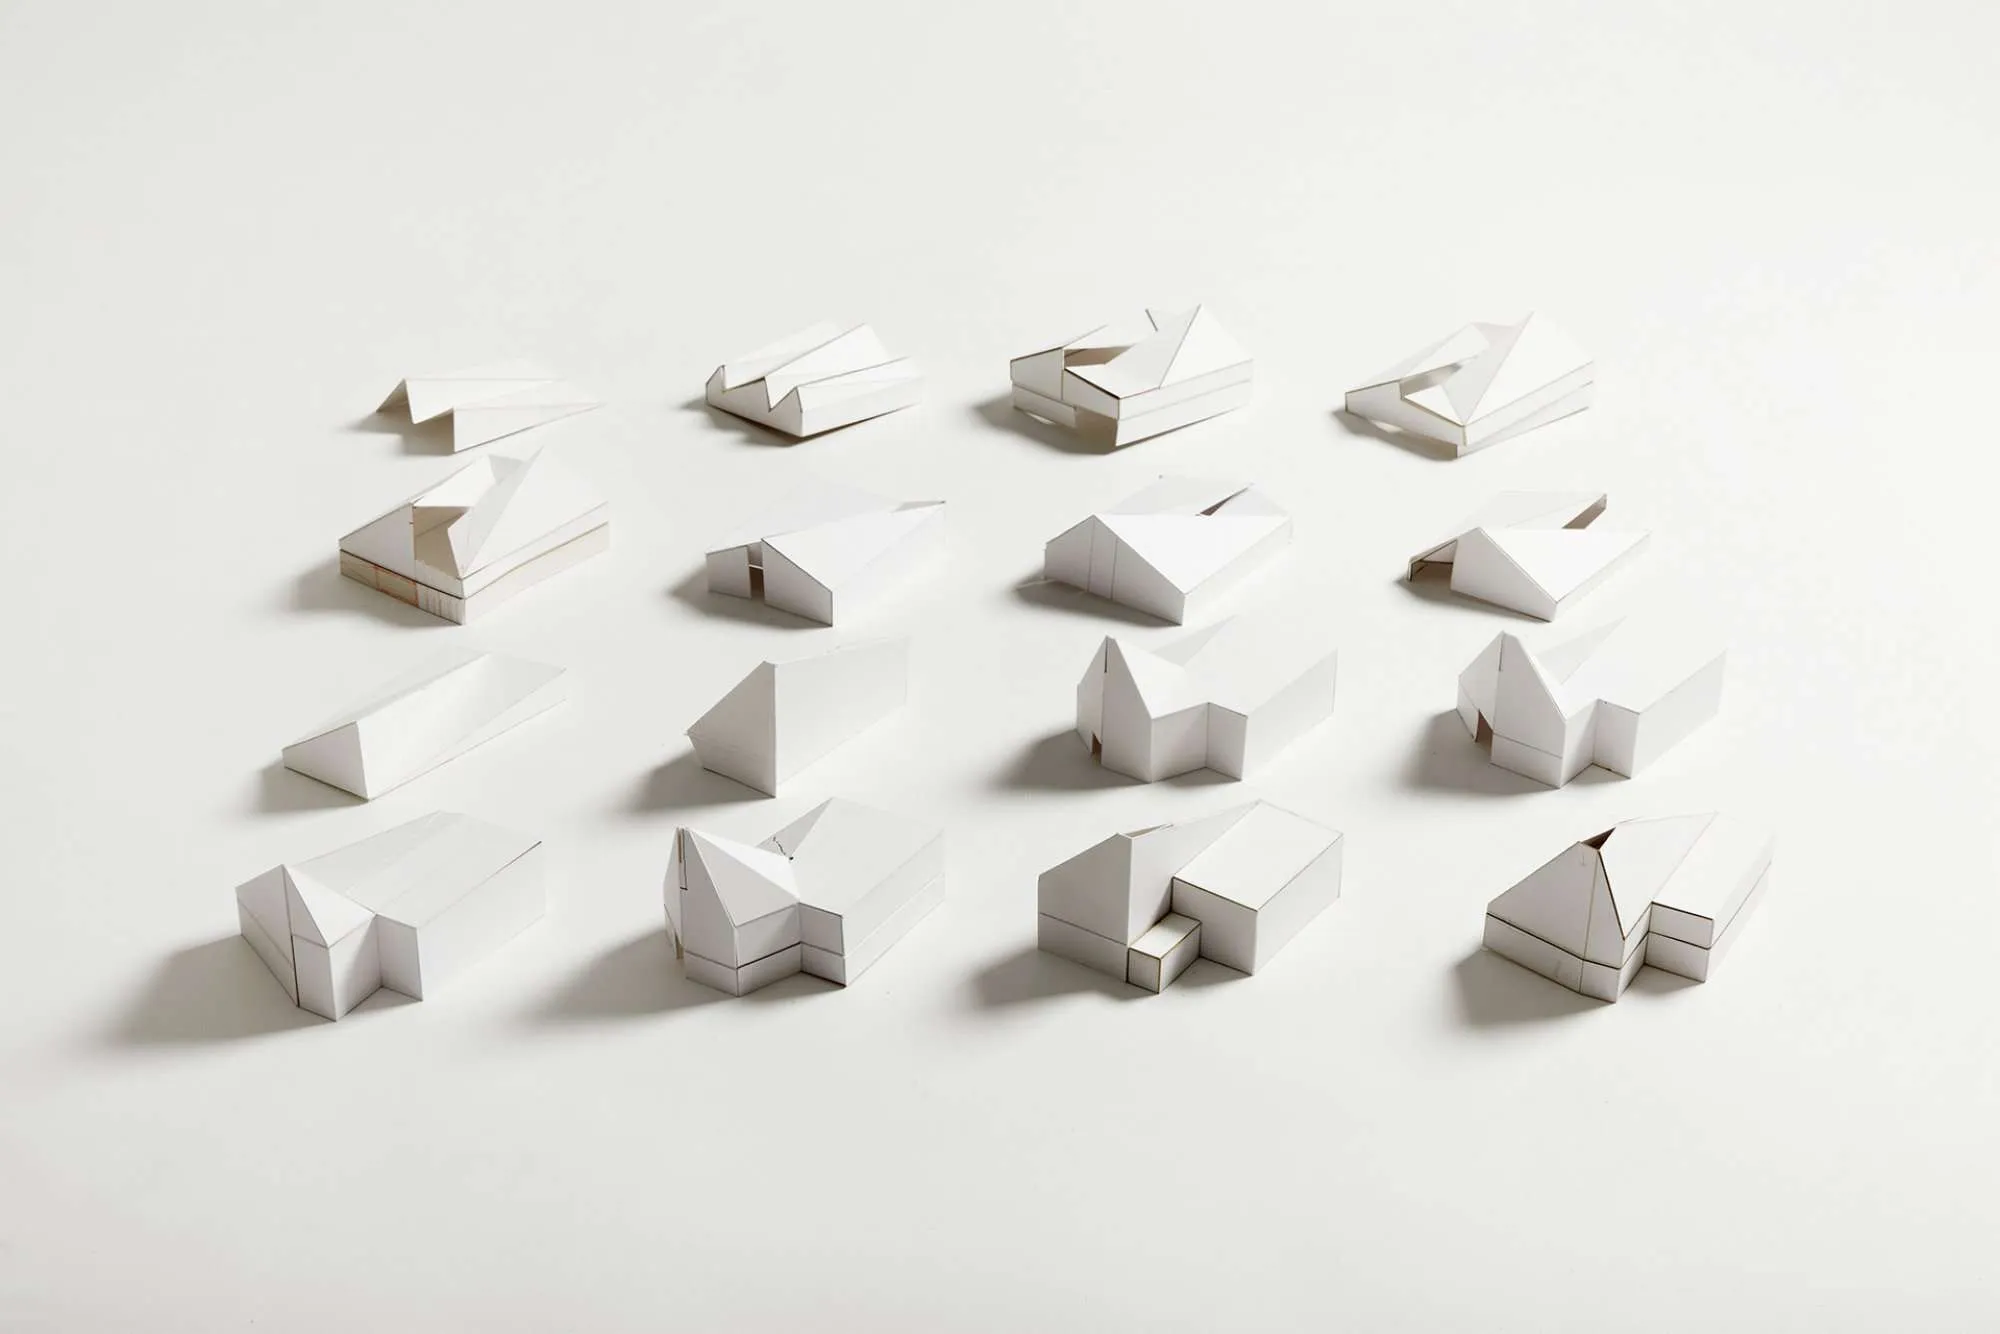
In aerospace, precision and performance are non-negotiable. 3D Printing’s ability to produce intricate, lightweight prototypes quickly makes it invaluable for aerospace engineering.
From testing aerodynamic properties to creating lightweight structural parts, 3D Printing helps aerospace companies push the limits of innovation.
- Example: Aircraft manufacturers can 3D print prototype components to test for fit, weight, and durability before committing to full-scale production. This speeds up development and helps keep costs under control.
Consumer Products

Consumer products require rapid design iterations to stay competitive, and 3D Printing is the perfect solution for quick Prototyping.
From electronics to wearable tech, brands can quickly create, test, and refine their products to better meet customer expectations.
- Example: A consumer electronics company could prototype new smartphone accessories in days, testing form, fit, and functionality with real users before launching the final product. This speeds up product development and enhances the chances of market success.
Challenges and Solutions in 3D Prototyping
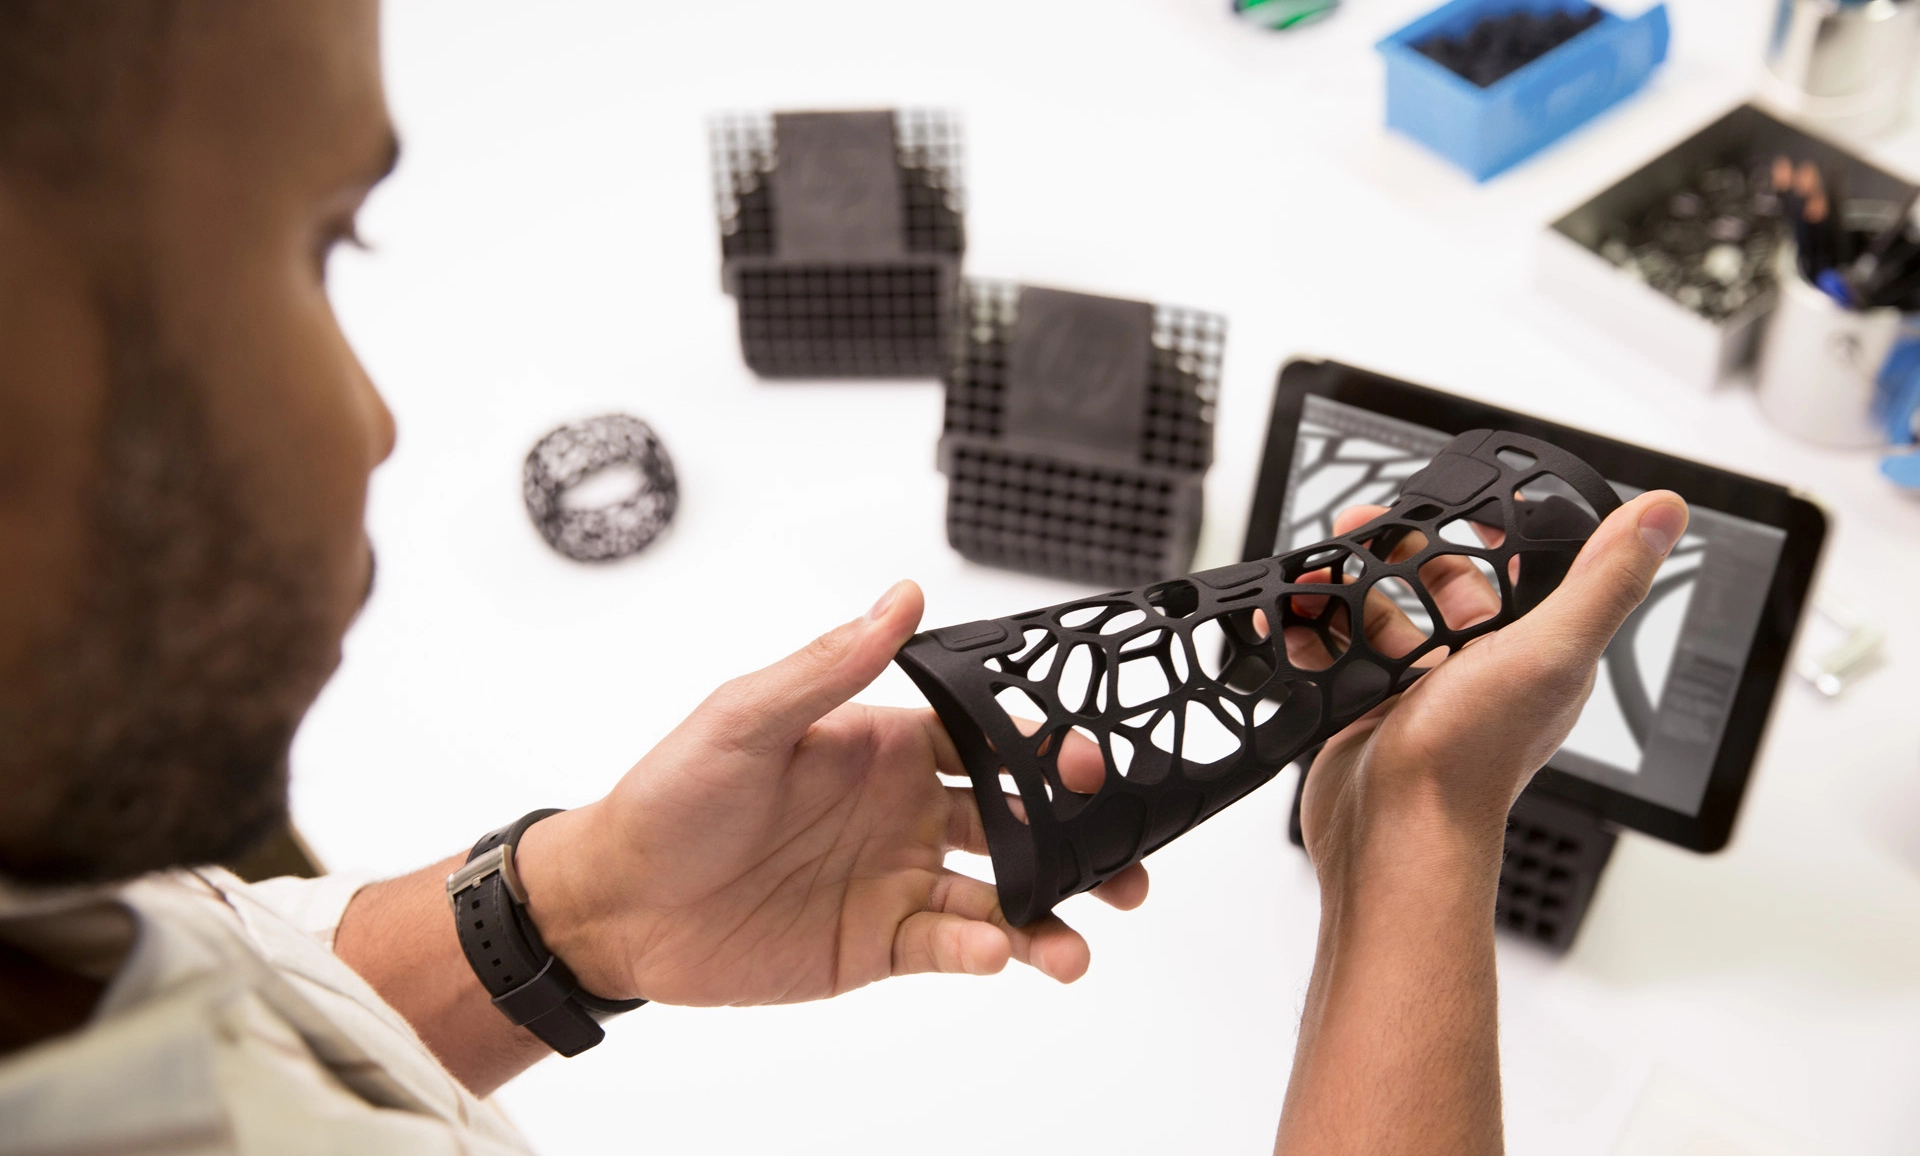
While 3D Prototyping is highly beneficial, it also presents some challenges.
Here’s a look at common issues and ways to overcome them.
1. Material Limitations
Though 3D Printing offers various materials, not all are suited for every prototype.
For example, PLA is great for concept models but may lack the strength for functional prototypes.
Projects needing specific properties like heat resistance or flexibility may face limited material choices or higher costs.
- Solution: Begin by selecting materials based on the prototype’s purpose—use PLA for concept models, while tougher options like ABS or Nylon are ideal for functional prototypes. For special properties, consider specialty filaments or resins that offer flexibility or UV resistance.
2. Size Constraints
Build volume limitations on 3D printers can restrict the size of prototypes, which is challenging for industries needing large parts, like automotive or aerospace.
- Solution: Divide large designs into smaller sections that fit within the printer’s build area, assembling them post-printing with adhesives or interlocking features. Alternatively, look into large-format printers or consider outsourcing to providers with suitable equipment.
3. Design Accuracy
High precision can be hard to achieve, especially with entry-level printers, impacting functionality for prototypes needing tight tolerances or detailed finishes.
- Solution: Use printers known for precision, like SLA or SLS models, and regularly calibrate your equipment. For fine details, adjust layer height and speed settings and use post-processing to refine accuracy.
4. Design Iteration Speed
Frequent design iteration is key in Prototyping, but printer speeds and post-processing requirements can slow progress, and high-speed printers are costly.
- Solution: Invest in a high-speed printer, such as SLA, if rapid iteration is essential, or streamline CAD adjustments to focus on small changes. For quicker early-stage iterations, consider outsourcing to a 3D printing service if in-house resources are limited.
Future of 3D Printing in Rapid Prototyping

The future of 3D Printing in rapid Prototyping is bright, with advancements that will make Prototyping faster, more versatile, and more efficient. Here’s a look at some key trends shaping the landscape.
1. Multi-Material Printing
Imagine building prototypes that incorporate multiple materials in a single print—this is becoming a reality with multi-material 3D printers.
These printers can simultaneously print with different materials, enabling prototypes with varied textures, colors, and properties.
This innovation is particularly valuable in fields like medical devices and electronics, where prototypes may need both flexibility and rigidity within the same part.
2. New Additive Manufacturing Technologies
While traditional 3D printing methods like FDM, SLA, and SLS continue to evolve, new technologies such as Continuous Liquid Interface Production (CLIP) and Multi Jet Fusion (MJF) bring higher speeds and better surface finishes.
These advancements allow companies to achieve faster iteration cycles and produce robust prototypes, enhancing product development, especially for industries with demanding quality standards.
3. Increased Use of AI and Machine Learning
AI and machine learning are beginning to optimize the 3D printing process by analyzing design files to catch potential issues before Printing begins, reducing errors and material waste.
In the future, AI-powered software might even suggest design improvements for enhanced structural integrity, reducing the need for multiple iterations.
4. Sustainability in 3D Printing
Sustainability is a growing focus in 3D Printing, with developments in recyclable and biodegradable materials making 3D Printing greener.
Additionally, because additive manufacturing produces less waste than traditional methods, it’s gaining popularity among companies aiming for sustainable manufacturing.
FAQs Related to 3D Printing Prototyping
Conclusion

3D printing has revolutionized rapid prototyping, providing a faster, cost-effective, and flexible solution for product development.
From concept models to functional prototypes, it enables companies to refine designs efficiently and bring products to market more quickly.
Ready to take your product development to the next level?
Embrace 3D printing for rapid prototyping and experience the benefits of streamlined iterations, reduced costs, and enhanced design flexibility.
Start prototyping smarter today!
Related Articles
- Ultimate Guide to Non-Ferrous Metals and Uses
- 3D Printing vs CNC Machining: Which Method is Best?
- Brass vs Bronze vs Copper: Key Differences and Uses
- Comprehensive Guide to Metal Strength and Chart
- Aluminum Extrusion Process: Techniques, Benefits, and Applications
- Types of Machining Processes: Full Guide
- Types of Aluminum Alloys: Properties and Industry Uses
- Comprehensive Guide to Bead Blasting Finishes
- Comprehensive Guide to Metal Strength and Chart


 English
 Arabic
 German
 Spanish
 French
 Italian
 Javanese
 Korean
 Portuguese
 Russian
 Hindi
 Chinese
